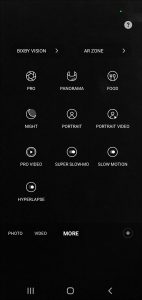
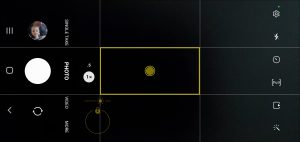
On our first couple of trips overseas Ken packed his digital camera and all its equipment and proceeded to lug it around every day. He ended up taking the majority of our photos on his phone. It was easier to share pictures with our kids online, he could edit in place and it took up a lot less space in his luggage. Now that the cameras in mobile phones are of the highest quality there is no need to carry around bulky camera equipment anymore. We are the converted.
However there is still an art to taking good pictures. Cameras are much simpler to operate but I continue to learn more about them every trip. To save you some time I want to share my (and I am not the photographer in this team) tips for taking great travel photos.
- Be able to access your camera quickly
It is important to get that perfect shot as it happens. Keep your phone in an easily accessible pocket or purse. Have an easy to find icon on the main screen so all you have to do is swipe and click to get the picture. It may feel foolish but I would recommend you practice this move.
- Clean your lens frequently
When your phones are in and out of your pockets or purse and being held in sweaty hands your lens do get dirty. This will result in blurry photos. My phone will actually remind me to clean my lens and I am surprised how often it comes up.
- Check your HDR (High Dynamic Range) Settings
The HDR setting combines three(3) different settings into the final image on your phone. According to Apple “ HDR (high dynamic range) in Camera helps you get great shots in high-contrast situations. [Your phone] takes several photos in rapid succession at different exposures and blends them together to bring more highlight and shadow detail to your photos.” These should be set automatically or left on in your camera. Check the settings on your phone to confirm.
- Rule of Thirds
This rule helps to ensure you photos are properly composed. Any person should only occupy 1 – 2 grids on either side to allow for landscape behind. The person you are taking photo of should be no more than 5m from photographer. Don’t overlook the option of bending down to capture height and breadth of landmarks or landscapes. You can turn on grid settings in settings tab and this will divide your screen to help with achieving the best composition.

- Focus on your Subject
To focus on your subject lightly tap your screen. When the icon comes up you can use it to focus your photo. As well you can use the lower slide icon to brighten or darken your exposure.
- Add a Filter
This can be done before or after you take the photo. Hit the icon at top right (looks like magic wand) and then slide across to select desired filter. The bar underneath (scale 1-10) determines how much of the filter will be applied.
- Continuous Shooting or Burst
This feature takes a rapid succession of photos to capture movement. It is great for sports and other types of photos involving movement. Swipe O button down to take a burst shoot and then release when you have it. You can pick the one you like and then delete the rest.
- Longer Exposure Apps
You can buy or download the app to get light trails and other fancy exposures. This is just one example of some of the photography available. Have some fun with ones you can purchase for your phone such as microphones, 3 in 1 lens kits, protective cover for underwater photos and many others. Keep in mind these will add an expense to your travel photos.
- Shoot from Interesting Angles
Consider the worm’s eye or bird’s eye views of iconic landscapes and landmarks. Get creative and have fun with it. Taking pictures from weird angles can result in the most memorable such as those taken from lower angle upwards for expanse. I’m often the one crawling around taking the “artistic” pictures while Ken is faithfully recording our travels.
- Take time to edit your photos
Start by selecting the best image then crop, rotate, adjust perspective, brighten shadows, increase brightness and contrast, adjust colour tone, and apply filters as desired. Check out the smiley face icon which can be used to draw and add stickers or text. Spend time practising with the edit function on your phone especially if you plan to upload your photos directly to social media. While taking the pictures watch for the effect of natural light or sun. Shadows on face can be fixed later. You can find the editing option on your phone or there are a number of free to expensive options you can install on your computer for after you download your pictures to your drive.
Like any skill, new or old, practise makes perfect. Our adult children are very good at taking photos on their phones because that is all they know. We are learning as we go.
